
| 일 | 월 | 화 | 수 | 목 | 금 | 토 |
|---|---|---|---|---|---|---|
| 1 | 2 | 3 | 4 | 5 | 6 | 7 |
| 8 | 9 | 10 | 11 | 12 | 13 | 14 |
| 15 | 16 | 17 | 18 | 19 | 20 | 21 |
| 22 | 23 | 24 | 25 | 26 | 27 | 28 |
- html
- set
- 스택
- sql
- 큐
- Java
- BFS
- 스프링부트
- 리소스모니터링
- string
- spring boot
- List
- alter
- CSS
- date
- javascript
- GC로그수집
- Properties
- Calendar
- priority_queue
- dfs
- NIO
- scanner
- union_find
- Union-find
- map
- deque
- math
- JPA
- 힙덤프
- Today
- Total
매일 조금씩
11/24 - Java(11) : Collection(2차원 배열), Arrays, NIO(list, filelist) , IO(InputStream, OutputStream, Reader, Writer, Buffered) 본문
11/24 - Java(11) : Collection(2차원 배열), Arrays, NIO(list, filelist) , IO(InputStream, OutputStream, Reader, Writer, Buffered)
mezo 2020. 11. 26. 08:36


Collection
1. 2차원 배열 (1차원 ArrayList + 객체)
import java.util.ArrayList;

public class ArrayListEx06 {

	public static void main(String[] args) {
		// TODO Auto-generated method stub
		ArrayList<ArrayList<String>> datas = new ArrayList<ArrayList<String>>();

		ArrayList<String> data1 = new ArrayList<String>();
		data1.add("1");
		data1.add("2");
		data1.add("3");
		ArrayList<String> data2 = new ArrayList<String>();
		data2.add("11");
		data2.add("22");
		data2.add("33");
		ArrayList<String> data3 = new ArrayList<String>();
		data3.add("111");
		data3.add("222");
		data3.add("333");

		datas.add(data1);
		datas.add(data2);
		datas.add(data3);

//		System.out.println(datas.size());
//		System.out.println(datas.toString());

		for(int i = 0; i<datas.size(); i++) {
			ArrayList<String> data = datas.get(i);
			for(int j = 0; j<data.size(); j++) {
				System.out.println(data.get(j));
			}
		}

		for(ArrayList<String> data : datas) {
			for(String s : data) {
				System.out.println(s);
			}
		}
	}

}
ArrayList안에 ArrayList가 담긴 형태이다.
위의 코드를 보면 다음과 같이 for문으로 데이터를 가져올 수 있다.
for(int i = 0; i<datas.size(); i++) {
    ArrayList<String> data = datas.get(i);
    for(int j = 0; j<data.size(); j++) {
        System.out.println(data.get(j));
    }
}

for(ArrayList<String> data : datas) {
    for(String s : data) {
        System.out.println(s);
    }
}
Arrays 클래스
▷p521
배열을 좀더 효과적이게 사용하기 위해서 Arrays클래스를 만들었다.
자바스크립트와 똑같이 쓴다.
지금까지와 다르게 toString()을 쓸 때 인자값으로 Arrays 객체를 넣는다.
ex) toString(arrs1)
1. 메서드
- fill(배열이름, ~) : 배열을 ~로 채운다.
- sort(배열이름) : 오름차순으로 정렬한다.
import java.util.Arrays;

public class ArraysEx01 {

	public static void main(String[] args) {
		// TODO Auto-generated method stub
		String[] arrs = {"aaa","bbb","ccc"};

		System.out.println(Arrays.toString(arrs));

		// arrs를 xxx로 채운다
		Arrays.fill(arrs,"xxx");
		System.out.println(Arrays.toString(arrs));

		// arrs의 0~1을 yyy로 채운다
		Arrays.fill(arrs, 0, 2, "yyy");
		System.out.println(Arrays.toString(arrs));

		String[] arrs1 = {"aaa","bbb","ccc"};
		String[] arrs2 = {"aaa","bbb","ccc"};

		// 참조값비교
		System.out.println(arrs1 == arrs2);
		// 값 비교
		System.out.println(Arrays.equals(arrs1, arrs2));

		Integer[] nums = {5,2,3,1,4};
		Arrays.sort(nums);
		System.out.println(Arrays.toString(nums));
	}

}

위 코드에선 값 비교와 참조값 비교를 유의해서 보자.
// 참조값비교
System.out.println(arrs1 == arrs2);
// 값 비교
System.out.println(Arrays.equals(arrs1, arrs2));
배열 변수는 참조값을 저장하는데 여기서도 그렇다.
2. 배열 값 복사
- Arrays.copyOf(원본배열, 복사할 길이) : 배열 전체 복사
- Arrays.copyOfRange(원본 배열, 복사할 시작 인덱스, 복사할 끝 인덱스) : 끝인덱스 -1까지 복사
- System.arraycopy(원본 배열, 0, 복사할 배열, 0, 복사할 끝 인덱스) : 끝인덱스 -1 까지 복사
import java.util.Arrays;

public class ArrayCopyExample {

	public static void main(String[] args) {
		// TODO Auto-generated method stub
		char[] arr1 = {'J','A','V','A'};

		// 방법1
		char[] arr2 = Arrays.copyOf(arr1, arr1.length);
		System.out.println(Arrays.toString(arr2));

		// 방법2
		char[] arr3 = Arrays.copyOfRange(arr1, 1, 3);
		System.out.println(Arrays.toString(arr3));

		// 방법3
		char[] arr4 = new char[arr1.length];
		// arraycopy(복사될 배열, 복사될 배열 시작위치,복사할 배열, 복사할 배열 시작위치, 어디까지)
		System.arraycopy(arr1,0,arr4,0,arr1.length);
		for(int i = 0; i<arr4.length; i++) {
			System.out.println("arr4[" + i + "]=" + arr4[i]);
		}

	}

}

3. 배열 항목 정렬
책과 조금 다른 부분이 있었는데
name을 가져오면 Member 클래스에서 name의 접근제한을 private이 아닌 public으로 해줘야한다.
sort() 메서드를 활용하여 Arrays 객체 안의 String을 오름차순으로 정렬한다.
public class Member implements Comparable<Member> {
	private int serial;
	public String name;

	public Member(String name) {
		this(1111, name);
	}


	public Member(int serial, String name) {
		this.serial = serial;
		this.name = name;
	}

	@Override
	public int compareTo(Member arg0) {
		return name.compareTo(arg0.name);
	}
}
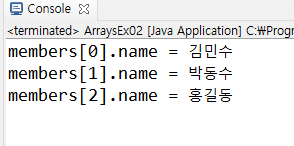
import java.util.Arrays;

public class ArraysEx02 {

	public static void main(String[] args) {
		// TODO Auto-generated method stub
		Member m1 = new Member("홍길동");
		Member m2 = new Member("박동수");
		Member m3 = new Member("김민수");

		Member[] members = {m1,m2,m3};

		// 각 멤버의 항목들을 오름차순으로 정렬
		Arrays.sort(members);

		// 출력
		for(int i = 0; i<members.length; i++) {
			System.out.println("members[" + i + "].name = " + members[i].name);
		}

	}

}
NIO 기반 입출력 및 네트워킹
1. 디렉토리 내부의 파일 가져오기
두가지 메소드를 쓰는 방법이 있다.
- list() : String[]으로 리스트를 가져온다.
- listFiles() : File[]로 리스트를 가져온다.
가장 먼저 가져오고자 하는 디렉토리를 다음과 같이 선언한다.
File f = new File("c:\\java");
1-1. list()
String[] lists = f.list();위와같이 리턴타입이 String인 리스트 배열을 생성한다.
출력은 다음과 같다.
String[] lists = f.list();
for(String list : lists) {
    File subfile = new File("c:\\java\\" + list);
    if(subfile.isDirectory()) {
        // 디렉토리
        System.out.println("[" + list + "]");
    }else {
        // 파일
        System.out.println(list);
    }
}
1-2. listFiles()
File[] lists = f.listFiles();위와같이 리턴타입이 File인 배열을 생성한다.
출력은 다음과 같다.
File[] lists = f.listFiles();
for(File list: lists) {
    if(list.isDirectory()){
        // 디렉토리
        System.out.println("[" + list + "]");
    }
    else {
        // 파일
        System.out.println(list);
    }
}
1-3. 전체 코드 및 결과
import java.io.File;

public class FileEx04 {

	public static void main(String[] args) {
		// TODO Auto-generated method stub

		// 디렉토리 내부의
		// 디렉토리나 파일 목록 가져오는 방법
		// list() 		- String[]
		// listFiles() 	- File[]

		File f = new File("c:\\java");
//		String[] lists = f.list();
//		for(String list : lists) {
//			File subfile = new File("c:\\java\\" + list);
//			if(subfile.isDirectory()) {
//				// 디렉토리
//				System.out.println("[" + list + "]");
//			}else {
//				// 파일
//				System.out.println(list);
//			}
//		}
		File[] lists = f.listFiles();
		for(File list: lists) {
			if(list.isDirectory()){
				// 디렉토리
				System.out.println("[" + list + "]");
			}
			else {
				// 파일
				System.out.println(list);
			}
		}
	}

}

2. 파일(디렉토리) 이름변경
- renameTo(변경파일이름) : 같은 디렉토리에 있으면 이름변경 / 다른 디렉토리면 이동
- delete() : 파일 삭제
import java.io.File;

public class FileEx05 {

	public static void main(String[] args) {
		// TODO Auto-generated method stub

		// 파일(디렉토리) 생성/이름변경/삭제
		// 생성: mkdir() / createNewFile()

		File f = new File("c:\\java", "test.txt");
		File f1 = new File("c:\\java", "newtest.txt");

		// 같은 디렉토리에 있으면 이름변경 / 다른 디렉토리면 이동
		if(f.renameTo(f1)) {
			System.out.println("변경 완료");
		}else {
			System.out.println("변경 실패");
		}

		if(f1.delete()) {
			System.out.println("삭제 완료");
		}else {
			System.out.println("삭제 실패");
		}

	}

}
3. 경로 정의(Path)
▷p1102
4. 파일 시스템 정보
▷p1105
import java.io.IOException;
import java.nio.file.FileStore;
import java.nio.file.FileSystem;
import java.nio.file.FileSystems;
import java.nio.file.Path;

public class FileSystemExample {

	public static void main(String[] args) throws IOException{
		// TODO Auto-generated method stub
		FileSystem fileSystem = FileSystems.getDefault();
		for(FileStore store : fileSystem.getFileStores()) {
			System.out.println("드라이버명: " + store.name());
			System.out.println("파일시스템: " + store.type());
			System.out.println("전체 공간: " + store.getTotalSpace() + "바이트");
			System.out.println("사용 중인 공간: " +
			(store.getTotalSpace() - store.getUnallocatedSpace())+"바이트");
			System.out.println("사용 가능한 공간: "  + store.getUsableSpace() +"바이트");
		}
		System.out.println("파일 구분자: " + fileSystem.getSeparator());
		System.out.println();

		for(Path path: fileSystem.getRootDirectories()) {
			System.out.println(path.toString());
		}
	}

}

IO 기반 입출력 및 네트워킹
NIO는 파일 겉모습을 건드렸지만 이건 파일 내부를 건드린다.
▷p994
최상위 클래스가 InputStream, outputStream, Reader, Writer 이다.
마지막에 예외처리 후 finally 에서 close() 를 해야 파일이 안깨진다.

XXXInput(Output)Stream 은 다국어 문자 파일 외 전부 접근이 가능하다.
다국어 문자는 reader와 writer로 처리한다.
1. FileInputStream
파일을 읽는 기능을 하는 InputStream
1-1. 파일 내용 한글자씩 읽기
- read() : 한글자씩 읽는다. read의 갯수가 읽는 글자의 양이다.
import java.io.FileInputStream;
import java.io.FileNotFoundException;
import java.io.IOException;

public class FileInputStreamEx01 {

	public static void main(String[] args) {

		// c:\\java\\test.txt
		// 123456
		// abcdefg
		// 가나다라마바


		// 한글자씩 받아오기

		FileInputStream fis = null;

		// 파일이 열린다
		try {
			fis = new FileInputStream("c:\\java\\test1.txt");

			int data = 0;
			data = fis.read();

			// ascii 코드값이 나오기 때문에 (1이 49로 나옴)
			// char로 형변환을 시켜줘야한다.
			System.out.println(data);
			System.out.println((char)data);


			// read()의 갯수가 읽는 양이다.
			data = fis.read();

			System.out.println(data);
			System.out.println((char)data);

		} catch (FileNotFoundException e) {
			// e.printStackTrace();

			System.out.println("[에러]: " + e.getMessage());
		} catch (IOException e) {
			e.printStackTrace();

		}finally {
			if (fis != null) try {fis.close();} catch (IOException e) {}
		}
	}
}
1-2. 파일 내용 전체 읽기
InputStream은 다국어 외의 모든 파일을 읽을 수있다.
조건문으로 파일내용.read() != 1사용
FileInputStream fis = null;먼저 이렇게 FileInputStream 타입의 fis를 선언하고,
1) 읽는 법
fis = new FileInputStream("c:\\java\\test.txt");

// 파일 전체를 읽는 구문
int data = 0;
// 파일을 끝까지 읽을 때의 조건문
while((data = fis.read()) != -1) {
    // enter키 까지 다 읽기 때문에 println 안한다.
    System.out.print((char)data);
}
System.out.println();
fis 에 읽고자 하는 파일을 넣어준 후 ,
한 글자씩 read() 할때마다 int data 해당 글자의 ascii 값을 담는다.
만약 그 값이 -1 이면 내용이 없어서 끝이라는 뜻이기 때문에 -1이 아닐때 동안 루프를 돌린다.
내용을 출력할 땐 ascii 값인 data를 있는 그대로 출력하기 위해 char 로 형변환 해주어야 한다.
파일 내용에 엔터도 포함되어있기 때문에 println이 아닌 print를 사용한다.
만약 println을 사용하면 한글자마다 엔터를 치게 된다.
2) 전체 코드 및 결과
import java.io.FileInputStream;
import java.io.FileNotFoundException;
import java.io.IOException;

public class FileInputStreamEx02 {

	public static void main(String[] args) {
		// TODO Auto-generated method stub

		// 파일 전체내용을 가져오기

		FileInputStream fis = null;

		try {
			fis = new FileInputStream("c:\\java\\test.txt");

			// 파일 전체를 읽는 구문
			int data = 0;
			// 파일을 끝까지 읽을 때의 조건문
			while((data = fis.read())!= -1) {
				// enter키 까지 다 읽기 때문에 println 안한다.
				System.out.print((char)data);
			}
			System.out.println();
		} catch (FileNotFoundException e) {
			// TODO Auto-generated catch block
			// e.printStackTrace();

			System.out.println("[에러] " + e.getMessage());
		} catch (IOException e) {
			// TODO Auto-generated catch block
			e.printStackTrace();
		}finally {
			if(fis != null) try { fis.close();} catch(IOException e) {}
		}
	}

}

1-3. 프로젝트 내부의 파일 읽기
"상대경로"를 사용한다.
위의 2번 코드에서 fis의 정의만 아래와 같이 상대경로로 바꿔주면 된다.
fis = new FileInputStream("./test.txt");문제) '\n'을 (n)으로 출력하기 + '\r' 을 (r)로 출력하기
while((data = fis.read()) != -1) {
    if(data == '\r') {
        System.out.println("(r)");
    }else if(data == '\n') {
        System.out.print("(n)");
    }else {
        System.out.print((char)data);
    }
}
2번 코드의 데이터 출력 while문 안에 if문을 추가 하였다.
String이 아니기 때문에 ==연산을 사용하여 '\r'나 '\n'과 같은지 판별후 조건에 맞게 출력하면된다.
2. FileOutputStream
파일에 쓰는 기능을 하는 OutputStream
2-1. 한글자씩 쓰기
한글 이외에 영어, 숫자, 문자 다 된다.
import java.io.FileNotFoundException;
import java.io.FileOutputStream;
import java.io.IOException;

public class FileOutputStreamEx01 {

	public static void main(String[] args) {


		// 한글자씩 쓰기

		FileOutputStream fos = null;

		try {

			// 파일이 없으면 생성
			// 파일이 있으면 덮어쓰기

			fos = new FileOutputStream("./newtest.txt");

			fos.write('1'); // 밑에 catch에 IOException잡아주면 에러 사라짐
			fos.write('1');
			fos.write('1');
			fos.write('\r');  // 윈도우일때만 이거쓸수 있음
			fos.write('\n');
			fos.write('2');
			fos.write('2');
			fos.write('2');

			System.out.println("출력 완료");

		} catch (FileNotFoundException e) {
			// TODO Auto-generated catch block
			e.printStackTrace();
		}catch (IOException e){
			e.printStackTrace();
		}finally {
			if(fos != null) try { fos.close();} catch(IOException e) {}
		}
	}

}
파일이 없으면 생성하고 파일이 있으면 덮어쓴다.
3. FileInputStream, FileOutputStream을 사용한 파일 복사
아래의 코드는 전체 코드의 핵심이 되는 부분이다.
int data = 0;
while((data = fis.read()) != -1) {
    fos.write(data);
}
전체 코드를 보면
import java.io.FileInputStream;
import java.io.FileNotFoundException;
import java.io.FileOutputStream;
import java.io.IOException;

public class CopyEx01 {

	public static void main(String[] args) {
		// TODO Auto-generated method stub

		FileInputStream fis = null;
		FileOutputStream fos = null;

		try {
			fis = new FileInputStream("./Jellyfish.jpg");
			fos = new FileOutputStream("./newJellyfish.jpg");

			int data = 0;
			while((data = fis.read()) != -1) {
				fos.write(data);
			}
			System.out.println("복사 완료");

		} catch (FileNotFoundException e) {
			// TODO Auto-generated catch block
			e.printStackTrace();
		} catch (IOException e) {
			// TODO Auto-generated catch block
			e.printStackTrace();
		}finally {
			if(fos != null) try {fos.close();} catch(IOException e) {}
			if(fis != null) try {fis.close();} catch(IOException e) {}
		}
	}

}
4. FileReader
▷p1002
객체 타입만 달라지지 FileInputStream과 똑같다.
문자 단위로 읽는다.
그럼 영어, 문자는 물론 한국어도 안깨지고 나온다.
import java.io.FileNotFoundException;
import java.io.FileReader;
import java.io.IOException;

public class FileReaderEx01 {

	public static void main(String[] args) {

		FileReader fr = null;
		try {
			fr = new FileReader("./test.txt");

			int data = 0;
			while((data = fr.read()) != -1) {
				System.out.print((char)data);
			}
			System.out.println();
		} catch (FileNotFoundException e) {
			// TODO Auto-generated catch block
			e.printStackTrace();
		} catch (IOException e) {
			// TODO Auto-generated catch block
			e.printStackTrace();
		}finally{
			if(fr != null) try {fr.close();} catch(IOException e){}
		}
	}

}

5. FileWriter
문자 단위로 쓴다.
문자파일 같은 경우엔 FileReader, FileWriter쓰고
이미지 부터 나머진 전부 FileInput(Outpur)Stream 사용.
import java.io.FileWriter;
import java.io.IOException;

public class FileWriteEx01 {

	public static void main(String[] args) {

		FileWriter fw = null;

		try {
//			fw = new FileWriter("./newtest3.txt");
			fw = new FileWriter("./newtest3.txt", true);

			// 문자열을 써도된다.
			// 문자열을 문자로 취급하기 때문에 가능한듯

			String msg = "hello";
			msg += "\n";
			msg += "hello";
			msg += "\n";
			msg += "hello";

			fw.write(msg);

//			fw.write("hello");
//			fw.write("\n");
//			fw.write("hello");
//			fw.write("\n");
//			fw.write("hello");

			System.out.println("출력 완료");
		} catch (IOException e) {
			// TODO Auto-generated catch block
			e.printStackTrace();
		}finally {
			if(fw != null) try {fw.close();} catch(IOException e) {}
		}
	}

}
파일에 쓰다보면
overwrite(덮어쓰기), append(뒤에 붙이기) 두가지가 있다.
기존에 쓰던
fw = new FileWriter("./newtest3.txt");위의 코드는 overwrite 이고,
fw = new FileWriter("./newtest3.txt", true);
이 코드는 append모드 이다. 기존 파일 내용에 뒤에 덧붙여서 써진다.
6. 보조스트림
▷p1028
입출력 성능을 향상시키기 위해 존재하는 버퍼이다.
BufferedInputStream, BufferedReader
BufferedOutputStream, BufferedWriter
원래의 코드에 추가되어 사용된다.
6-1. 사용법
선언, 초기화, 객체 생성에서 두가지 방법이 있다.
FileInputStream fis = null;
BufferedInputStream bis = null;

fis = new FileInputStream("./test.txt");
bis = new BufferedInputStream(fis);
BufferedInputStream bis = null;
bis = new BufferedInputStream(new FileInputStream("./test.txt"));두번째 코드는 첫번째 코드를 간소화 시킨 것이다.
반복문에선 BufferedInputStream 객체를 읽거나 쓰도록 돌아간다.
int data = 0;
while((data = bis.read()) != -1){
    System.out.print((char)data);
}
System.out.println();
finally에서 반드시 보조스트림도 같이 닫아줘야한다. 따라서
if(bis != null) try {bis.close();} catch(IOException e) {}
if(fis != null) try {fis.close();} catch(IOException e) {}
간소화된 코드라면 위에서 두번째줄은 쓰지 않아도 된다.
전체 코드 및 결과
import java.io.BufferedInputStream;
import java.io.FileInputStream;
import java.io.FileNotFoundException;
import java.io.IOException;

public class BufferedEx01 {

	public static void main(String[] args) {
		// TODO Auto-generated method stub

		// null로 초기화 안해주면 에러남
		// FileInputStream fis = null;
		BufferedInputStream bis = null;

		try {
			// fis = new FileInputStream("./test.txt");
			// bis = new BufferedInputStream(fis);
			bis = new BufferedInputStream(new FileInputStream("./test.txt"));

			int data = 0;
			while((data = bis.read()) != -1){
				System.out.print((char)data);
			}
			System.out.println();
		} catch (FileNotFoundException e) {
			// TODO Auto-generated catch block
			e.printStackTrace();
		} catch (IOException e) {
			// TODO Auto-generated catch block
			e.printStackTrace();
		}finally {
			if(bis != null) try {bis.close();} catch(IOException e) {}
		}
	}

}

6-2. 버퍼를 사용한 파일 복사
1) Input(Output)stream
import java.io.BufferedInputStream;
import java.io.BufferedOutputStream;
import java.io.FileInputStream;
import java.io.FileNotFoundException;
import java.io.FileOutputStream;
import java.io.IOException;

public class CopyEx03 {

	public static void main(String[] args) {

		BufferedInputStream bis = null;
		BufferedOutputStream bos = null;

		try {
			bis = new BufferedInputStream(new FileInputStream("./test.txt"));
			bos = new BufferedOutputStream(new FileOutputStream("./newbuffertest.txt"));

			int data = 0;
			while((data = bis.read()) != -1) {
				bos.write(data);
			}
			System.out.println("복사 완료");

		} catch (FileNotFoundException e) {
			e.printStackTrace();
		} catch (IOException e) {
			e.printStackTrace();
		}finally {
			if(bos != null) try {bos.close();} catch(IOException e) {}
			if(bis != null) try {bis.close();} catch(IOException e) {}
		}
	}
}
2) Reader, Writer
import java.io.BufferedReader;
import java.io.IOException;
import java.io.FileReader;

public class BufferedEx02 {

	public static void main(String[] args) {

		BufferedReader br = null;

		try {
			br = new BufferedReader(new FileReader("./test.txt"));

			int data = 0;
			while((data = br.read()) != -1) {
				System.out.print((char)data);
			}
			System.out.println();
		} catch (IOException e) {
			e.printStackTrace();
		}finally {
			if(br != null) try { br.close();} catch(IOException e) {}
		}
	}

}
6-3. 한줄씩 읽기 - BufferedReader
원래는 read()를 통해 한글자씩 읽는 것만 가능했으나,
BufferedReader를 사용하면 readLine()이라는 메서드로 한줄씩 String을 데이터로 받을 수 있다.
위의 6-2 의 2)에서 변수 data에 관한 것만 String으로 바꿔주면 된다.
- readLine() : enter키 전까지 읽는다.
import java.io.BufferedReader;
import java.io.IOException;
import java.io.FileReader;

public class BufferedEx02 {

	public static void main(String[] args) {

		BufferedReader br = null;

		try {
			br = new BufferedReader(new FileReader("./test.txt"));

			// readLine() : enter키 전까지 읽는다.
			String data = null;
			while((data = br.readLine()) != null) {
				System.out.println(data);
			}
			System.out.println();
		} catch (IOException e) {

			e.printStackTrace();
		}finally {
			if(br != null) try { br.close();} catch(IOException e) {}
		}
	}

}
7. 파일 입출력 활용
▷p1018
문제) 파일을 읽어서 우편번호 검색 프로그램 - 동이름 일부
우편번호, 시도, 구군, 동, 리, 번지, 번호
java SearchZipcode 신사
신사1동
...
신사2동
+
(추가)
1. 2자 이상 입력
2. 구글링 - 한글만 입력
1) 내코드
import java.io.BufferedReader;
import java.io.FileNotFoundException;
import java.io.FileReader;
import java.io.IOException;
import java.util.Scanner;

public class SearchZipcode {

	public static void main(String[] args) {

		Scanner sc = new Scanner(System.in);

		System.out.print("동이름을 입력하세요 : ");
		String dong = sc.nextLine();

		// 입력받은 동이름을 한글자씩 쪼갬
		String[] dong2 = dong.split("");


		String data = null;
		BufferedReader br = null;

		try {
			br = new BufferedReader(new FileReader("./zipcode_seoul_utf8_type2.csv"));

			while((data = br.readLine()) != null) {
				// ,로 쪼갬
				String[] datas = data.split(",");
				// 동이 있는 부분을 한글자씩 쪼갬
				String[] dong3 = datas[3].split("");
				int count = 0;	// 일치하는 글자수 세기
				int compareLength = 0;	// 비교할 글자수 지정

				// 입력받은 동이름보다 글자수가 많으면
				// compareLength를 입력받은 동이름 글자수로 지정
				if(dong.length() <= dong3.length) {
					compareLength = dong.length();
				}else {	// 입력받은 동이름보다 글자수가 적으면 다음 주소로 넘어가게 continue
					continue;
				}

				// 한글자씩 비교해서 일치하는 글자수마다 count++
				for(int i = 0; i < compareLength; i++) {
					if(dong2[i].equals(dong3[i])) {
						count++;
					}
				}

				// 일치하는 글자수가 입력받은 동이름 글자수와 같으면
				// 해당 주소를 출력
				if(count == dong.length()) {
					System.out.println(data);
				}
			}
			System.out.println();

		} catch (FileNotFoundException e) {
			// TODO Auto-generated catch block
			e.printStackTrace();
		} catch (IOException e) {
			// TODO Auto-generated catch block
			e.printStackTrace();
		}finally {
			if(br != null) try { br.close();} catch(IOException e) {}
		}

	}

}
2) 조건 추가한 내코드
import java.io.BufferedReader;
import java.io.FileNotFoundException;
import java.io.FileReader;
import java.io.IOException;
import java.util.Scanner;

public class SearchZipcode01 {

	public static void main(String[] args) {

		Scanner sc = new Scanner(System.in);
		System.out.print("동이름을 입력하세요 : ");
		String dong = sc.nextLine();

		// 바른 입력이 들어올 때까지 입력을 받음
		while(true) {
			// 조건 1 - 한글입력
			boolean collect = true;
			for(int i = 0; i < dong.length(); i++) {
				char ch = dong.charAt(i);
				if(!(ch >='가' && ch <= '힣')) {
					System.out.println("한글을 입력하셔야 합니다.");
					collect = false;
					break;
				}
			}

			// 조건 2 - 2글자 이상 입력
			// 한글일 때만 실행
			if(collect) {
				if(dong.length() < 2) {
					System.out.println("2자리 이상 입력하셔야 합니다.");
				}else {
					break;
				}
			}

			// 두가지 조건을 모두 충족하지 못했다면 다시 입력
			System.out.print("동이름을 입력하세요 : ");
			dong = sc.nextLine();
		}

		String data = null;
		BufferedReader br = null;

		try {
			br = new BufferedReader(new FileReader("./zipcode_seoul_utf8_type2.csv"));

			while((data = br.readLine()) != null) {

				String[] datas = data.split(",");

				String dong3 = datas[3];

				if(dong3.startsWith(dong)) {
					System.out.println(data);
				}

			}
			System.out.println();

		} catch (FileNotFoundException e) {
			// TODO Auto-generated catch block
			e.printStackTrace();
		} catch (IOException e) {
			// TODO Auto-generated catch block
			e.printStackTrace();
		}finally {
			if(br != null) try { br.close();} catch(IOException e) {}
		}

	}

}


